This article describes in detail how to provision an Oracle Compute Cloud instance. The process is quite easy and straightforward. Once mastered, the entire process can take under 10 minutes.
An Oracle Compute Cloud instance is designed for those who want IaaS (Infrastructure as a Service). This is essentially a Linux box setup on the cloud for general use.
These instructions describe how to setup a trial account, create a new Compute Cloud instance, create your public/private key pair, and connect externally through SSH and VNC.
Sign Up for Trial
1. Navigate to https://cloud.oracle.com/compute.
2. Click on Try It.
3. You will be prompted to login using your Oracle.com account.
4. Once logged in, enter your information on the screen below. You must click on the Request Code button to receive a code by email before continuing.
Note that under Create New Account, whatever you enter there will be considered your "domain" name.

5. Then click on Sign up.
6. You will be taken to a confirmation page. Simply click on Done.

7. You are taken to a My Account dashboard.
Don't worry about that popup, it just describes the various roles you can assume and links to documentation, so just click on Continue.

8. The My Account dashboard is accessible at this URL:
https://myaccount.cloud.oracle.com/mycloud/faces/dashboard.jspx
And you must use your Oracle account to log in. This dashboard is not intended to create and manage your services, but rather more of an account page to view usage and billing information.

You may have access to one or more domain. For example, I have access with my Oracle.com account to two separate domains owned by two different companies. Each of those domains contains a list of services for that company.
When you create your account during a trial, a new domain is created for you (see Step 4) (in fact, you decide the name of the domain name).
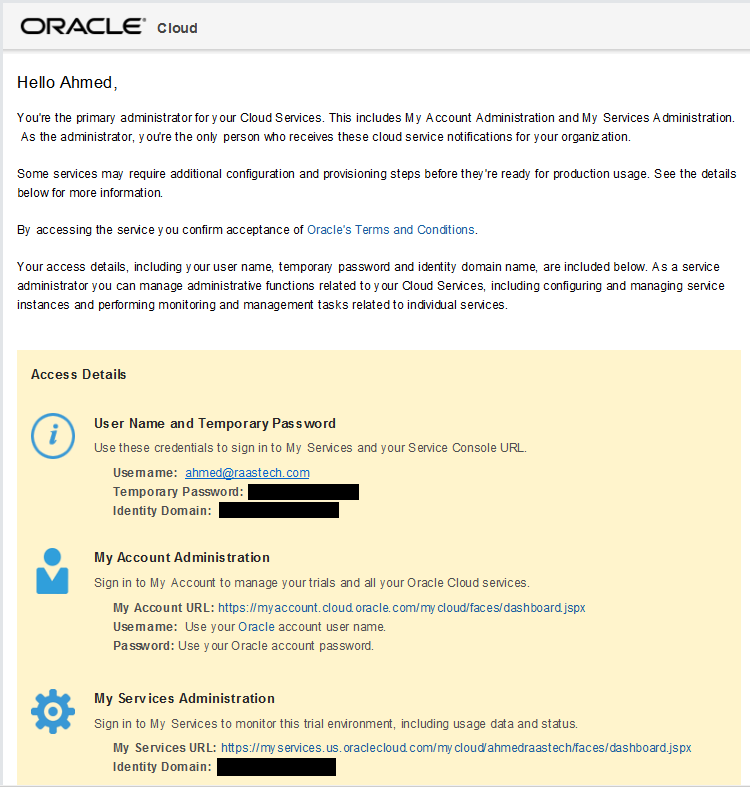
9. You will receive an email that will include three important pieces of information:
- Username
- Temporary Password
- Identity Domain
Create a Pair of Public/Private Keys
10. Download puttygen.exe and open it.
11. Click on the Generate button, and move the mouse over the blank area until done.

12. Enter a comment and passphrase.
For example, my comment is "blogserver-key-20160618" and that's what I'll be using as the filename as well.
The passphrase will be required for authentication to this private key.

13. Click on Save private key and save the file as blogserver-key-20160618.ppk.
This is your private key to be used by Putty.
14. Click on Conversions > Export OpenSSH key and save the file as blogserver-key-20160618.ssh.
This is your private key in OpenSSH format, to be used if you're using Linux-based ssh or scp.

15. Copy the text in the highlighted section, and paste it in a text file called blogserver-key-20160618.pub.
This is the public key that will be configured on your Compute Cloud instance.

16. So in the end, you should have a total of 3 files:

Sign in to My Services
17. Now navigate to the My Services page at:
https://myservices.us.oraclecloud.com/mycloud/[domain]/faces/dashboard.jspx
18. Log in using your temporary username and password.

Create a Compute Cloud Instance

21. Click on Create Instance.

Currently, there are 6 images available, so we've chosen the Oracle Linux 6.6 one. There are ways to maintain your own private images, but that is for a later discussion.

23. Select the specifications of your instance, then click on the > arrow.

24. On the Instance page, click on the Create Security List button.
25. Enter a name of a security list that will be associated to this instance and click on Create.
We will add firewall rules to this security list later.

26. Click on Add SSH Public Key.
27. Enter a name.
28. Open the file blogserver-key-20160618.pub and paste its contents into the Value field. Click on Add.

29. Provide any Name and Label to your instance. Click on the > arrow.

30. Click on Add New Volume to add a non-root disk which we intend on mounting to /u01.

31. Enter a name to this storage volume, select a size, then click on Add.

32. Click on the > arrow.

33. Click on the Create button to create the instance.
WARNING: After clicking on the button, it will appear that nothing happened. Do not click again but wait for 10 seconds instead.

34. It will say that it is "Initializing". It will take a few minutes for the instance to be created, and click the refresh icon every now and then until complete.

Configure Firewall
35. Click on Network > Security Lists.
Here, you will see the security list that we created when we configured the instance.

36. Click on Security Applications, then click on Create Security Application.
Basically, firewall rules are added by "application" and each application can have a port or port range.

37. Enter a name, and provide a port range of 5901 to 5901, then click on Create.
What we want is to add an application called "VNC" which we will assign the default VNC port of 5901, since we want to eventually open that port.

38. Here, you can see the security application we just created.

39. Click on Security Rules.
40. Enter a name, select "ssh" from the Security Application dropdown list, open it to the "public-internet" and provide a destination of our Security List. Then click on Create.
Here, we are essentially allowing public access to the application "ssh" to the Security List assigned to our instance.

41. Repeat the same step, but this time, select the newly created Security Application "VNC-BLOGSERVER" that we created earlier. Select the same options, then click on Create.

42. Here, you can view the two Security Rules that we created.

Log in with Putty
43. Open putty.exe.
44. Expand Connection > SSH > Auth and browse for the private key blogserver-key-20160618.ppk.

45. Click on Data, and enter the default user opc.

46. Click on Session, enter the public IP address of your instance, provide a name, click on Save to save it, then Open to connec to the server.

47. Enter the passphrase for the private key.

Setup the Linux Instance
48. Install some basic Oracle required packages as root:
sudo su -
yum install telnet
yum install gcc-c++
yum install glibc-devel
yum install sysstat49. Define a hostname:
hostname blogserver.raastech.com50. Edit the local hosts and add an entry to the private IP address:
echo "`ifconfig -a | grep Bcast | awk '{print $2}' | cut -f2 -d:` `hostname`" >> /etc/hosts
51. Edit the profile for both the root and oracle users to something more readable:
vi /root/.bash_profile /home/oracle/.bash_profile52. Add the following and save the file:
export PS1="\u@\h:\$PWD> "
alias ls='ls'
alias ll='ls -l'53. No need to create the oracle unix user since it already exists.
54. No need to edit the /etc/sysctl.conf file since it's already configured.
55. No need to edit the configuration for the pam_limits module (/etc/security/limits.conf) since it's already there.
Add the Mount Point
56. Create a mount point:
mkdir -p /u01
chown oracle:oinstall /u0157. Add the extra 26GB storage volume and mount it:
echo "View available disks"
lsblk
echo "Confirm that /dev/xvdc is a 'data' volume"
file -s /dev/xvdc
echo "Create file system, all data will be lost in it"
mkfs -t ext4 /dev/xvdc

echo "Backup fstab and edit it"
cp /etc/fstab /etc/fstab.orig.20160614
echo "/dev/xvdc /u01 ext4 defaults,nofail 0 2" >> /etc/fstab
echo "Mount /u01"
mount /u01
chown oracle:oinstall /u01
echo "Confirm that /u01 is mounted and available"
df -m

Install and Configure the VNC Server (optional)
58. Install the required VNC packages
yum install tigervnc-server
yum install xclock59. Start the VNC server
vncserver :1 -geometry 1280x720 -depth 1660. Edit the profile script
vi /root/.bash_profile61. Add the following and save the file
xhost +62. Edit the profile script of additional unix users that will require GUI access
vi /home/oracle/.bash_profile63. Add the following
export DISPLAY=:1
64. Open something like TightVNC and connect to your Compute Cloud instance

65. Open a terminal, connect as the oracle user, and run xclock to confirm everything is working fine.

- Oracle Compute Cloud Service (2016)

No comments:
Post a Comment