This blog post describes how to provision a barebones Linux server from Amazon Web Services (AWS) for the purpose of installing general Oracle software.
This instructions optionally include adding an extra mount point, enabling NFS, and installing VNC for remote GUI connectivity.
Create an EC2 Instance
1. Login to the AWS Management Console at:
https://us-west-2.console.aws.amazon.com/console/home
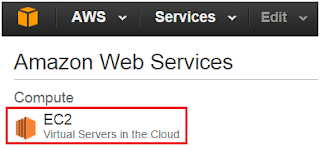
2. Click on "EC2" on the left-hand menu
3. Navigate to
Instances > Launch Instance
4. "Select" the Red Hat Enterprise Linux 7.1 instance type
5. Select an instance type (e.g., t2.medium)
6. Click on "Next: Configure Instance Details"
7. Keep all defaults
8. Click on "Next: Add Storage"
9. Click on "Add New Volume"
10. Enter the size of "10" for 10GB
11. Click on "Next: Tag Instance"
12. Enter the name of your instance (just a name, e.g., "My Oracle Server")
13. Click on "Next: Configure Security Group"
14. Provide a Security Group name and description, and add the firewall rules you want to allow
15. Click on "Review and Launch"

16. Click on "Launch" after reviewing the settings

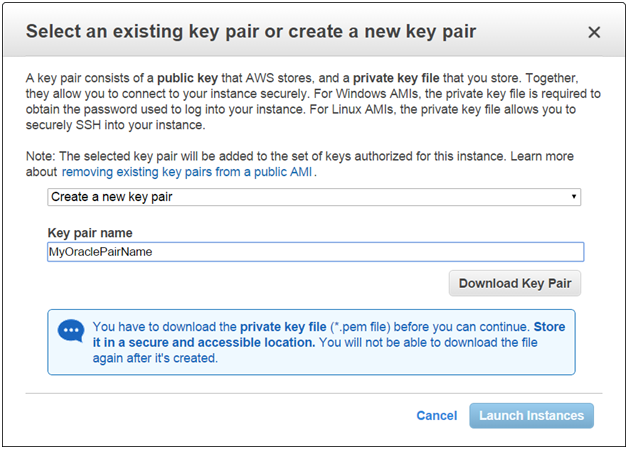
17. Enter a new key pair name, download key pair, and click on "Launch Instances"
18. Click on "View Instances" and the instance should be up in a few minutes
 Create an Elastic IP
19. Click on "Elastic IP" on the left-hand menu
20. Click on "Allocate New Address"
21. Click on "Yes, Allocate"
22. Click on "Close"
23. Right-click on the IP address and select "Associate Address"
24. Click on the Instance field and select your EC2 instance from the list
Create a Putty PPK File for SSH Access
25. Follow these instructions to convert the downloaded .pem file to a Putty compatible .ppk file
26. Login to the server via Putty or equivalent SSH client as the "ec2-user"
27. Then type sudo su - to login as the root user
Setup the Linux Server
28. Install some basic Oracle required packages
yum install telnet
yum install wget
yum install gcc
yum install gcc-c++
yum install glibc-devel
yum install libaio
yum install libaio-devel
yum install sysstat
yum install libstdc++-devel
yum install compat-libstdc++
yum install compat-libstdc
29. Define a hostname
hostname oradev.raastech.com
30. Type the following to get your local IP address
ifconfig -a | grep broadcast | awk '{print $2}'
31. Edit the local hosts by typing
vi /etc/hosts file and manually add your public and private IP addresses and a hostname of your choosing
52.27.XXX.XXX oradev-ext.raastech.com oradev-ext
172.31.XXX.XXX oradev.raastech.com oradev
32. Create the Oracle unix user
groupadd oinstall
groupadd dba
useradd nobody
useradd -c "Oracle Software Owner" -g oinstall -G dba oracle
passwd oracle
33. Edit the profile for both the 'root' and 'oracle' users to something more readable
vi /root/.bash_profile /home/oracle/.bash_profile
34. Add the following and save the file
export PS1="\u@\h:\$PWD> "
alias ls='ls'
alias ll='ls -l'
35. Edit the sysctl file
vi /etc/sysctl.conf
36. Add the following and save the file, updating the hostname and domainname accordingly
# Controls the maximum shared segment size, in bytes
kernel.shmmax = 68719476736
# Controls the maximum number of shared memory segments, in pages
kernel.shmall = 4294967296
# Controls the default maxmimum size of a mesage queue
kernel.msgmax = 65536
# Controls the maximum size of a message, in bytes
kernel.msgmnb = 65535
# Semaphores: semmsl, semmns, semopm, semmni
kernel.shmmni = 4096
kernel.sem = 256 32000 100 142
fs.file-max = 6815744
fs.aio-max-nr = 1048576
kernel.hostname = oradev.raastech.com
kernel.domainname = raastech.com
net.ipv4.ip_local_port_range = 9000 65500
net.core.rmem_default=262144
net.core.wmem_default=262144
net.core.rmem_max=4194304
net.core.wmem_max=1048576
kernel.msgmni = 2878
37. Load the sysctl settings
sysctl -p
38. Edit the configuration for the pam_limits module
vi /etc/security/limits.conf
39. Add the following to the bottom and save the file
oracle soft nofile 4096
oracle hard nofile 65536
oracle soft nproc 2047
oracle hard nproc 16384
Add an Extra 10GB Mount Point (optional)
40. Create a mount point
mkdir -p /u01
chown oracle:oinstall /u01
41. Add the extra EC2 volume and mount it
echo "View available disks"
lsblk
echo "Confirm that /dev/xvdb is a 'data' volume"
file -s /dev/xvdb
echo "Create file system, all data will be lost in it"
mkfs -t ext4 /dev/xvdb
echo "Backup fstab and edit it"
cp /etc/fstab /etc/fstab.orig.20150528
echo "/dev/xvdb /u01 ext4 defaults,nofail 0 2" >> /etc/fstab
echo "Mount /u01"
mount /u01
chown oracle:oinstall /u01
echo "Confirm that /u01 is mounted and available"
df -m
Install an NFS Server (optional)
42. Install the necessary NFS packages
yum install nfs-utils
43. Create a share folder
mkdir -p /u01/share
chown oracle:oinstall /u01/share
44. Edit the /etc/exports file
vi /etc/exports
45. Add the following and save the file (the hostnames denote which clients should have access)
/u01/share oraclient1.raastech.com(no_root_squash,rw,sync)
/u01/share oraclient2.raastech.com(no_root_squash,rw,sync)
46. Start the NFS server
service rpcbind start
service nfs start
47. Open port 2049 on the local firewall to allow remote NFS access to other EC2 instances
service firewalld start
firewall-cmd --permanent --zone=public --add-port=2049/tcp
firewall-cmd --reload
Configure the NFS Clients (optional)
48. On the client servers, run the following commands
yum install nfs-utils
telnet soadb.raastech.com 2049
mkdir -p /u01/share
chown oracle:oinstall /u01/share
sudo echo "oradev.raastech.com:/u01/share /u01/share nfs defaults 0 0" >> /etc/fstab
mount /u01/share
df -m
Install and Configure the VNC Server (optional)
49. Install the required VNC packages
yum groupinstall 'Server with GUI'
yum install tigervnc-server
yum install xclock
50. Open up the VNC port 5901 for remote access
service firewalld start
firewall-cmd --permanent --zone=public --add-port=5901/tcp
firewall-cmd --reload
51. Start the VNC server
vncserver :1 -geometry 1280x720 -depth 16
52. Edit the profile script
vi /root/.bash_profile
53. Add the following and save the file
xhost +
54. Edit the profile script of additional unix users that will require GUI access
vi /home/oracle/.bash_profile
55. Add the following
export DISPLAY=:1
56. Connect via a VNC client such TightVNC on port 1
Applicable Versions:
- Amazon Web Services (2015)
- Red Hat Enterprise Linux 7.1 64-bit


